You’re standing in your field, or maybe at your kitchen table with a notepad, trying to make a
decision that feels bigger than it should. Do you really need that seeder? Is a wheel hoe worth
$300, or should you just keep hand-hoeing? Can you actually justify a tractor right now, or is
there a smarter way to get the work done?
Here’s the thing: the equipment decisions you make in your first few years will shape the kind of
farm you run for the next decade. Spend wrong, and you’ll carry debt on machines that sit idle.
Spend smart, and you’ll build a toolkit that works as hard as you do, freeing up your time,
protecting your body, and helping you grow food that feeds your community. That’s what this
guide is about.
We wrote it for the farmer on 5 acres who’s weighing their options carefully. For the person on
20 acres, wondering whether a walk-behind tractor is enough or if it’s time to step up. For
anyone who wants to spend intentionally, not impulsively, and build a farm that works.
Let’s figure this out together.
Before You Buy Anything — The Questions That Actually Matter
The biggest equipment mistake small farmers make isn’t buying the wrong brand. It’s buying before they’ve thought hard enough about what they actually need. Before you walk into a dealership or scroll through auction listings, sit down and honestly answer these questions.
What are you actually going to grow or raise?
This sounds obvious, but the answer determines almost every piece of equipment you’ll ever need. A market gardener growing mixed vegetables on 3 acres has almost nothing in common with someone running a 40-acre hay operation. A homesteader raising chickens and pigs needs different tools than someone growing dry beans for a local food co-op.
Get specific. Not “vegetables” but which vegetables, in what quantities, for what markets? Not “livestock”, but what species, how many head, and how are you managing rotational grazing? The more specific your answer, the better your equipment list will be.
What tasks currently take the most time?
You should ask yourself these questions. Walk your farm for a week with a notepad and write down every task that is physically exhausting, time-consuming, or that you dread. Equipment should solve real problems, not imaginary future ones.
If weeding is killing you four hours a day, weeding tools belong at the top of your list. If you’re spending every morning hauling water to livestock because you don’t have water lines run to your pasture, a water line is more important than a new implement.
What’s your physical situation?
This one doesn’t get talked about enough. Do you have physical limitations that make certain tasks painful or impossible? Are you farming alone, with a partner, or with regular help? Can you realistically operate a full-size tractor safely, or would a walk-behind tractor better suit your scale and situation? Be honest. There’s no prize for toughing it out with the wrong equipment.
What does your farm’s layout look like?
Field shape and size matter more than most people realize. A long, narrow field of 2 acres might be better worked with walk-behind equipment than a compact tractor. Steep slopes change what equipment is safe to run. If your rows are 24 inches wide because you started that way, a tractor with standard wheel spacing may never fit down them. Don’t let future equipment force you to redesign your entire farm.
What’s your real budget, not your wish-list budget?
Write down the number. Not the number that makes you feel good, but the actual number you have available for equipment without putting your farm’s financial survival at risk. We’ll talk more about how to stretch that budget, but you need an honest starting point.
What Size Equipment Do You Actually Need?
Here is the truth that the equipment industry doesn’t love to advertise: bigger is not better on a small farm. It’s often worse.
Oversized equipment compacts soil more than smaller equipment. It burns more fuel. It can’t turn in tight spaces. It doesn’t fit down narrow rows. And it costs significantly more to purchase, insure, and repair.
The question isn’t “what’s the biggest equipment I can afford?” It’s “what’s the right size for the work I’m actually doing?”
Think about your bed or row widths first.
If you farm on permanent raised beds, your equipment needs to match those bed widths. If your beds are 30 inches wide with 18-inch paths, a tractor that’s 60 inches wide through the wheel track isn’t going to do you any favors, unless it’s designed for that configuration. Before you buy any powered equipment, measure your field layout and let that drive your decision.
Match horsepower to your actual work – not your ego.
A 25 HP compact tractor is more than enough for most operations under 10 acres. A 40-50 HP utility tractor becomes useful somewhere between 15 and 30 acres, depending on what you’re doing. Beyond 50 acres with row crops or hay, you start looking at full utility tractors in the 60-80 HP range.
For farms under 5 acres growing vegetables intensively, a walk-behind two-wheel tractor (like a BCS) can do almost everything you need and costs a fraction of a four-wheel tractor. Don’t let anyone tell you otherwise.
Think long term – but don’t over-buy for a farm you don’t have yet.
Yes, you might expand to 25 acres in five years. But buying a tractor sized for that expansion today means you’re paying for power you can’t use, dealing with a machine too heavy for your current soil, and burning money every time you run it for a light task.
A better approach: buy for where you are now, and plan a logical upgrade path. It’s usually more economical to sell a well-maintained compact tractor and step up than it is to pay the carrying costs on an oversized machine for years while you grow into it.
Who Will Service Your Equipment — and Why That Question Could Save You Thousands
This section might be the most undervalued piece of advice in all of farming.
Equipment breaks. It doesn’t matter if it’s brand new or lightly used. Belts snap. Hydraulic lines weep. PTO shafts. Engines need adjustments. And when it breaks during planting season or at peak harvest, every hour of downtime costs you real money and real stress.
Dealer proximity is not a luxury, it’s a strategic decision.
Before you commit to any major piece of equipment, find out where the nearest authorized dealer is. Not just a dealer who sells the brand, a dealer with a service department, trained technicians, and parts on hand. If the nearest dealer is 3 hours away, you need to factor that into your decision. A well-known brand with a dealer 20 minutes away will serve you better than a slightly higher-quality brand with no local service presence.
Ask dealers the right questions.
When you visit a dealership, and you should visit before you buy, ask specifically: Do you have a mobile service truck? What’s your average wait time for service during planting season? Can you get parts within 48 hours for this model? Do you offer loaner equipment if mine is in for service?
A good dealer relationship is genuinely one of your farm’s assets. Treat it that way.
For hand tools and smaller equipment, local repair matters too.
Even your wheel hoe or walk-behind tractor will eventually need a replacement part or a tune-up. Find out who in your area services the brands you’re considering. Local agricultural repair shops, farm co-ops, and community colleges with agricultural programs are often underutilized resources for small farmers.
Learn basic maintenance yourself.
There is no substitute for knowing how to do the basics on your own equipment. Change oil, replace belts, sharpen blades, check hydraulic fluid, grease fittings. This alone can prevent the majority of equipment failures and will save you significant money over time. Most manufacturers publish detailed service manuals, get one and read it.
Which Activities Are Eating Your Time? (Start There)
If you had to identify the one principle that should guide every equipment decision on a small farm, it’s this: buy equipment that solves your biggest time problems first.
Not the most exciting equipment. Not the equipment that makes your farm look impressive. The equipment that frees up hours of your week and lets you focus on the work only you can do.
Here are the most common time-draining activities on small farms and the equipment categories that address them:
Weeding:
This is almost universally the biggest time sink on small vegetable farms. If you’re spending four or more hours a week weeding by hand, even a modest investment in weeding tools, a stirrup hoe, a wheel hoe, a tine weeder, can transform your operation. Farmers who switch from purely hand-weeding to cultivating tools often cut their weed management time by 60 to 70 percent.
Watering and irrigation:
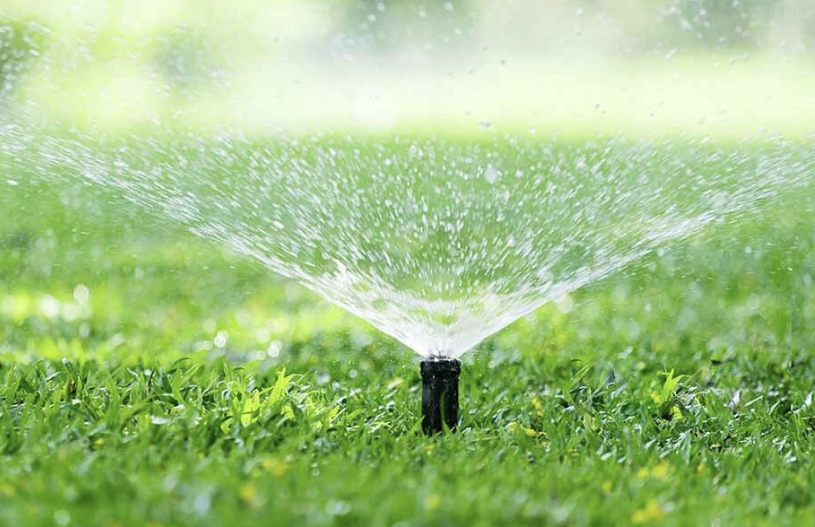
Hand-watering is a time-thief that scales poorly. If you’re spending significant time each day moving hoses or hand-watering, an investment in drip irrigation or overhead irrigation infrastructure pays back in time almost immediately. This belongs near the top of any list.
Harvest:
For vegetable farmers growing baby greens, salad mix, or high-volume crops, harvest can be the single biggest labor bottleneck. A quick-cut greens harvester can turn a four-hour harvest into a forty-five-minute harvest. That’s not an exaggeration; farmers report exactly that.
Post-harvest handling:
Washing, packing, cooling produce, and moving it from the field to storage is labor-intensive. Good harvest bins, a washing station, and cold storage infrastructure (even a DIY coolbot setup) have an enormous impact on quality and efficiency.
Hauling and moving things:
Wheelbarrows, harvest carts, ATVs, and small utility vehicles all fall in this category. Every farm needs something to move things from A to B. The right tool for your scale makes this effortless rather than exhausting.
When you map out which of these problems you’re actually experiencing, your equipment priority list writes itself.
Essential Equipment Categories
Let’s walk through the main equipment categories every small farmer should understand, and be honest about what matters and what doesn’t at different scales.
Soil Preparation Equipment
Good soil preparation is the foundation of everything. Your crops can’t perform if your soil isn’t properly worked. Here are the options from simplest to most powerful:
Broadfork
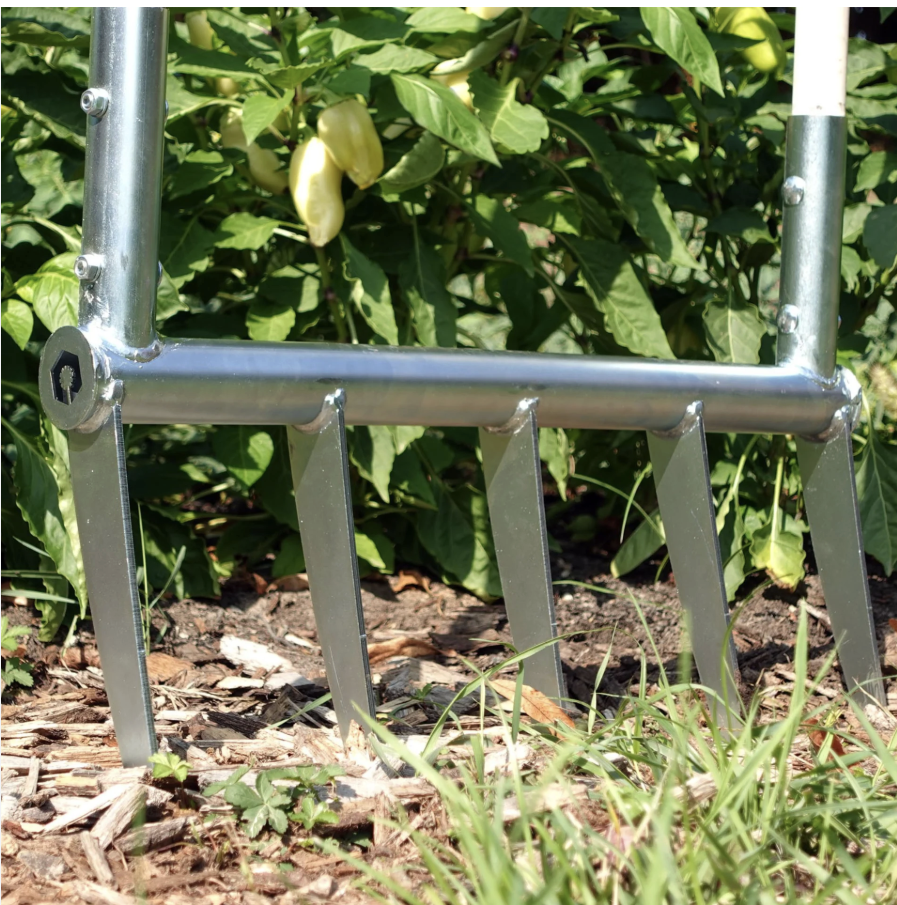
A broadfork is a large U-shaped tool with two handles and steel tines that you push into the soil with your foot and use to aerate and loosen without flipping the soil layer. It’s perfect for permanent bed systems and no-till approaches. For farms under 2 acres doing intensive vegetable production, a broadfork is one of the most useful tools you can own. Budget $150 to $300 for a quality one.
Bed preparation rake
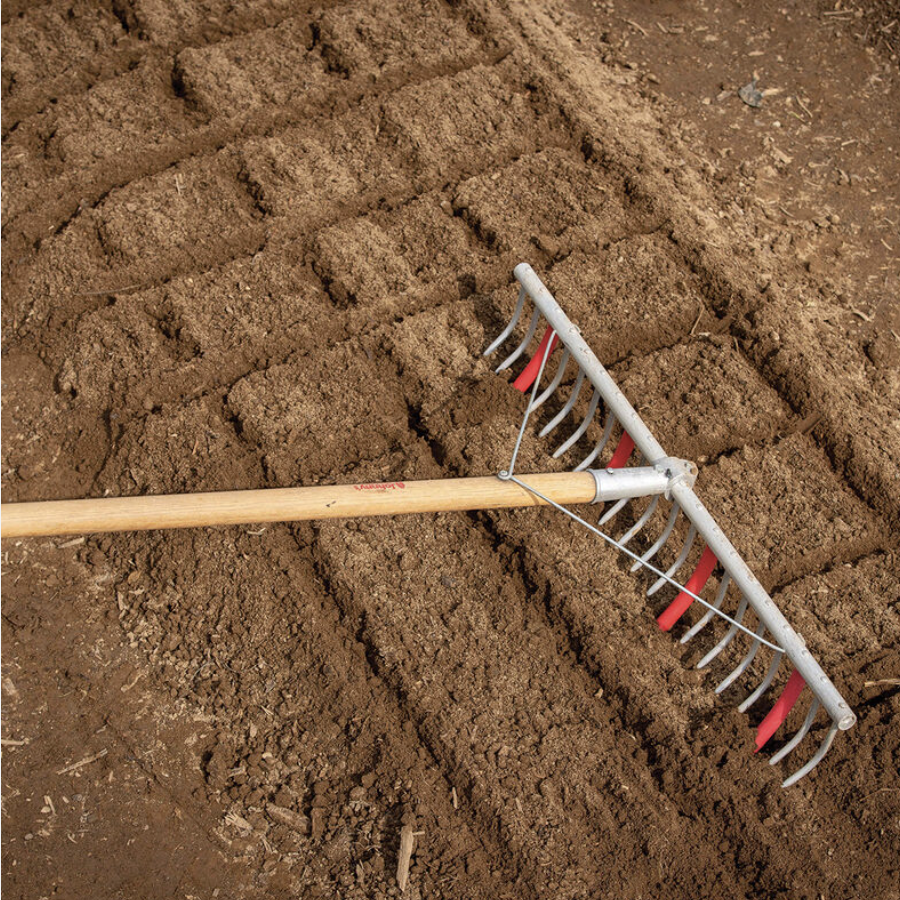
A wide-head rake designed for leveling and smoothing beds after you’ve added amendments or loosened the soil. An often-overlooked tool that saves enormous time when you’re transplanting. Budget $80 to $150
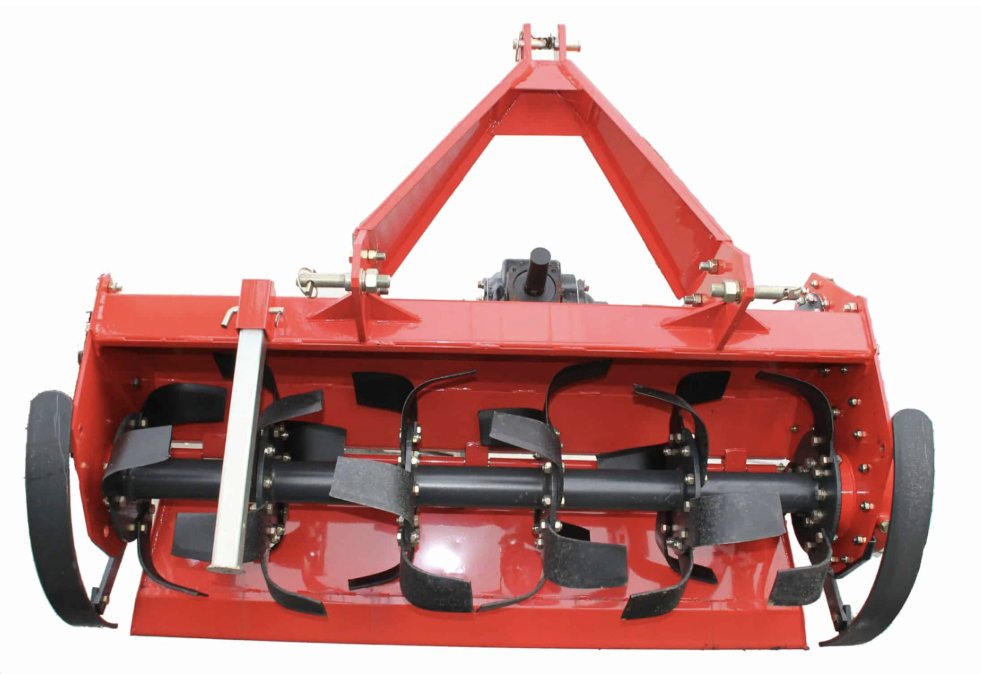
Garden tillers (rear-tine and front-tine)
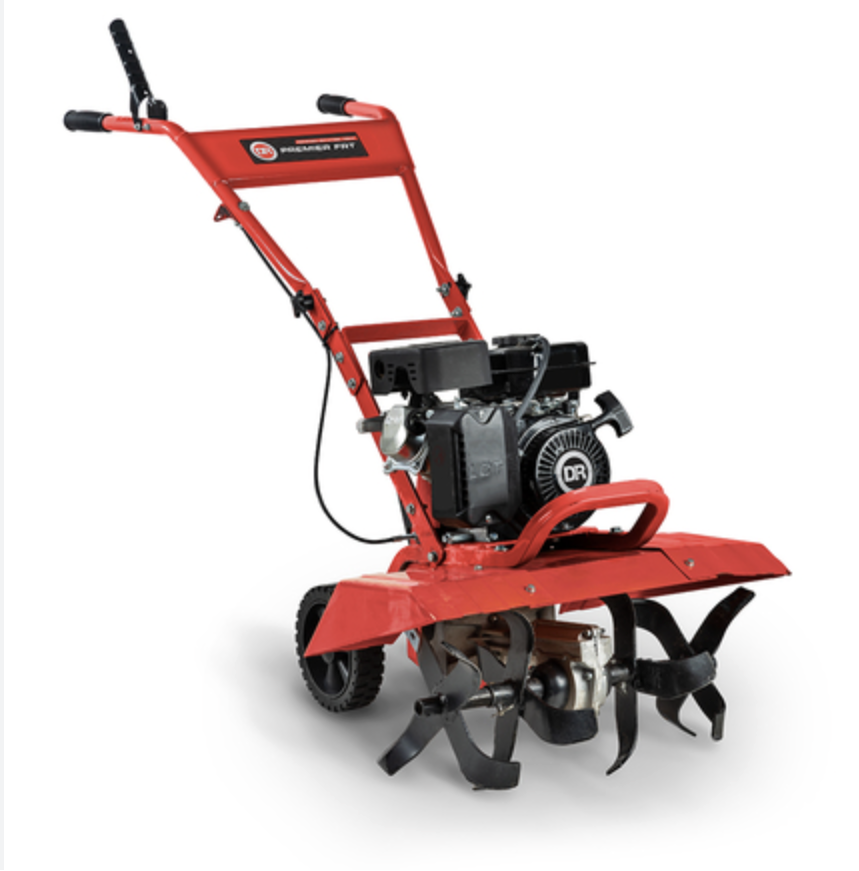
These are the gas-powered single-operator tillers you’re probably familiar with. They work well for smaller gardens and small farm plots, especially for incorporated compost or making a seedbed. They’re not ideal for permanent bed systems because they disturb soil structure, but they’re affordable, easy to use, and widely available. Budget $500 to $1,500(new).
Planting and Seeding Equipment
Getting your seeds in the ground accurately and efficiently is one of the most time-sensitive tasks on any farm. The right seeding equipment depends enormously on what you grow.
Hand push seeders
For vegetable farmers direct-seeding rows of carrots, beets, salad mix, radishes, or other small seeds, a quality push seeder is a game-changer. The Jang JP-1 is widely regarded as the best single-row precision seeder on the market. A five-row version increases efficiency for dense plantings dramatically. Budget $140 to $500, depending on model.
Garden dibbers
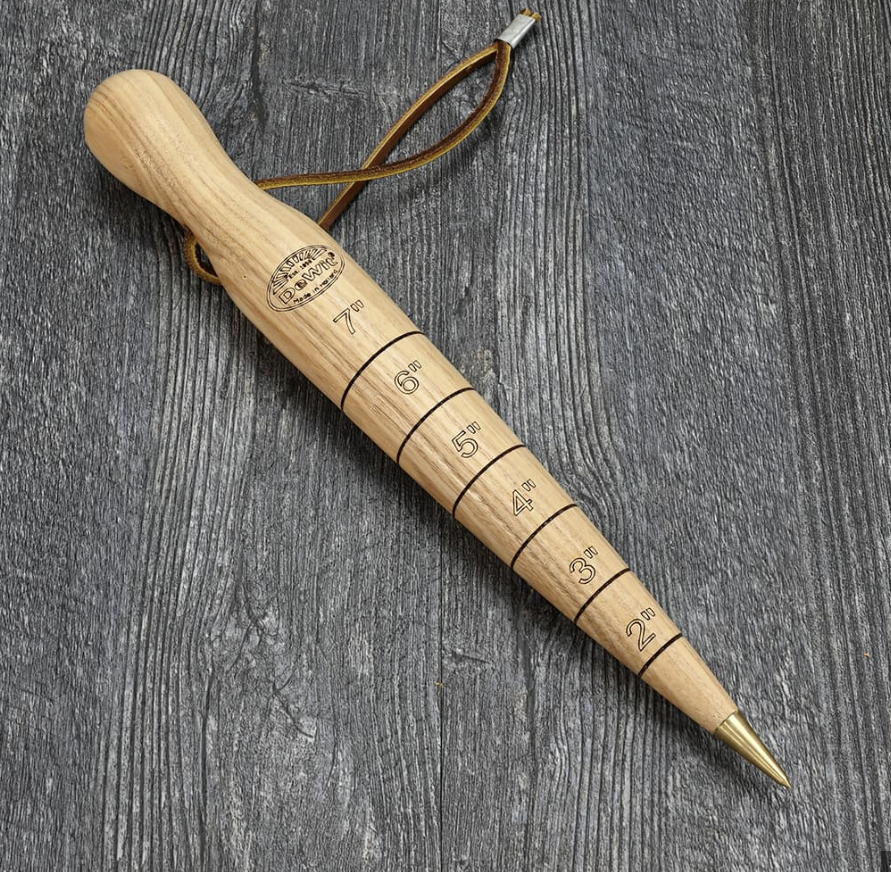
A simple, inexpensive tool for transplanting. A dibber makes uniform planting holes quickly and lets you set consistent depth. You’ll use it constantly on a transplant-heavy farm. Budget $30 to $80.
Transplant trays and nursery equipment
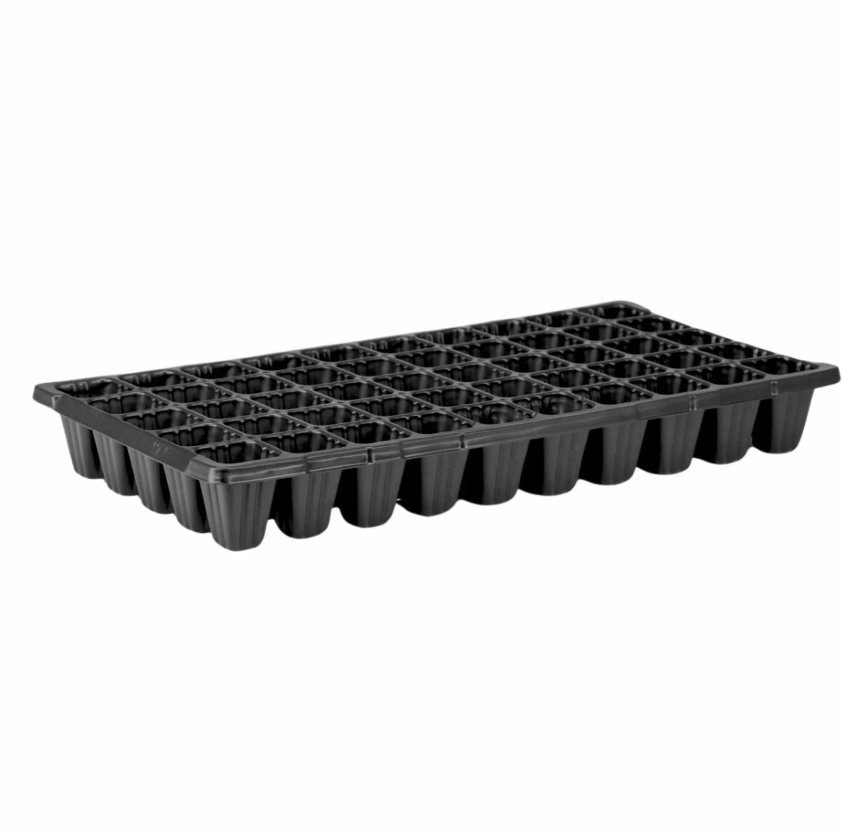
If you start your own seedlings, you need 72-cell and 128-cell trays, a flat filler or potting mix, and somewhere to germinate and grow out transplants. A small heated germination chamber or heat mat system is inexpensive but dramatically improves germination rates on cold-sensitive crops. Budget varies widely.
Grain drills and row crop planters
For farms growing grains, cover crops, or row crops at scale, a grain drill or planter is essential. These machines are significantly more expensive, typically starting around $2,000 for used equipment and $10,000 or more for new models, and are generally justified only when planting multiple acres of the same crop.
Weeding and Cultivation Equipment
This category is massively underrepresented in most small farm equipment guides, and it shouldn’t be. For vegetable farmers, especially, weeding tools have more impact on daily labor than almost anything else you can buy.
Stirrup hoe
A stirrup hoe has a blade that cuts on both the push and pull strokes, slicing weeds just below the soil surface while you walk down the row. Available in 3.25-inch, 5-inch, and 7-inch widths to match different row spacings. This is one of the best purchases any vegetable grower can make. Budget $40 to $80 per hoe.
Wheel hoe
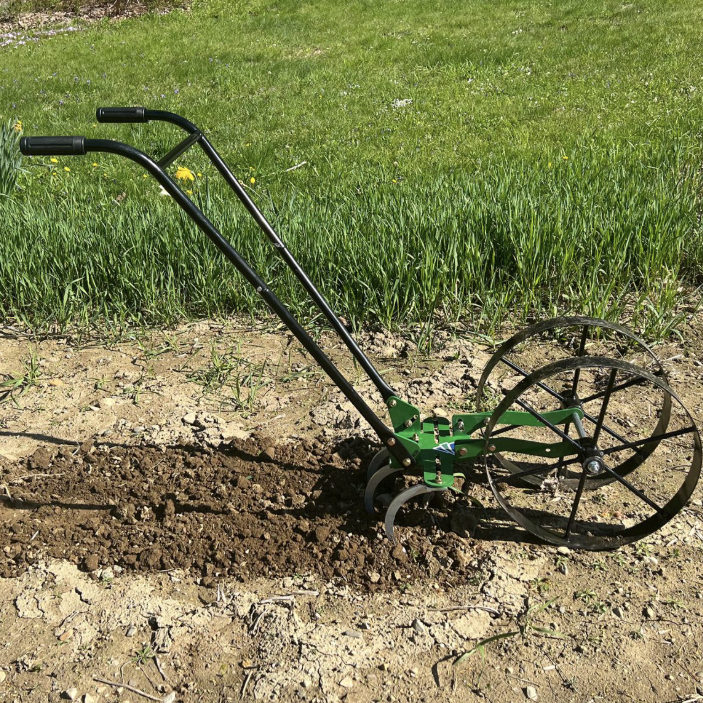
A wheel hoe is a walk-behind cultivation tool with an oscillating blade mounted on a wheel frame. You push it down a row, and it cultivates the soil while cutting emerging weeds. It’s faster than hand hoeing and covers more ground with less effort. Ideal for farms with single-row crops or wide path spacing. Budget $200 to $400.
Tine weeder
Also called a blind weeder, a tine weeder has a series of flexible steel tines that you drag over a seeded row just before or just after germination to destroy surface-germinating weed seeds. It’s especially effective for farmers growing dense rows of baby greens. Budget $150 to $400.
Flame weeder
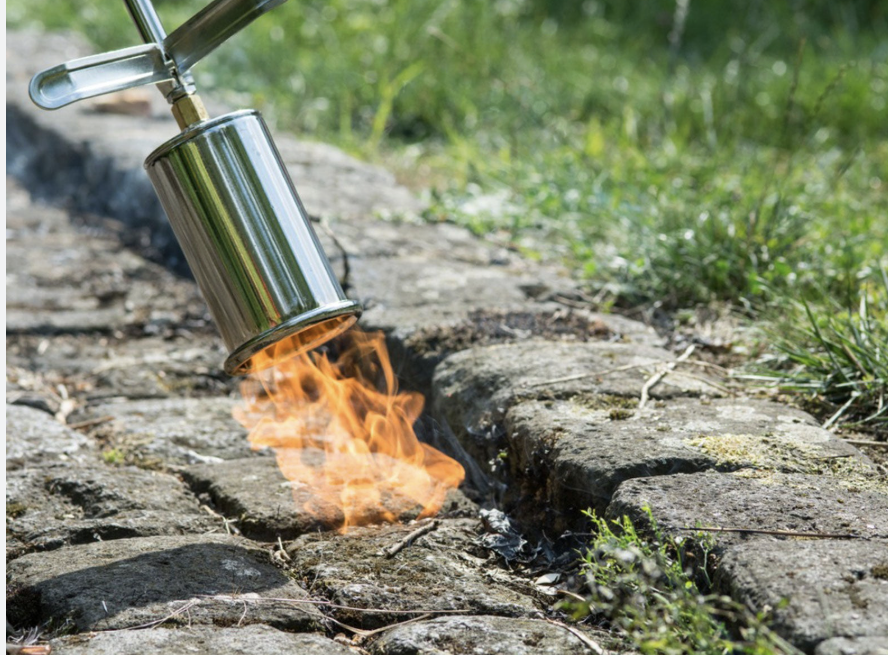
A flame weeder uses propane to briefly superheat the surface of the soil, killing young weed seedlings through cell disruption (not by burning them; a flick of flame is sufficient). It’s most effective as part of a stale seedbed technique, where you stimulate weed germination and then kill them before your crop emerges. Budget $200 to $600 for a backpack unit.
Weed barrier/landscape fabric
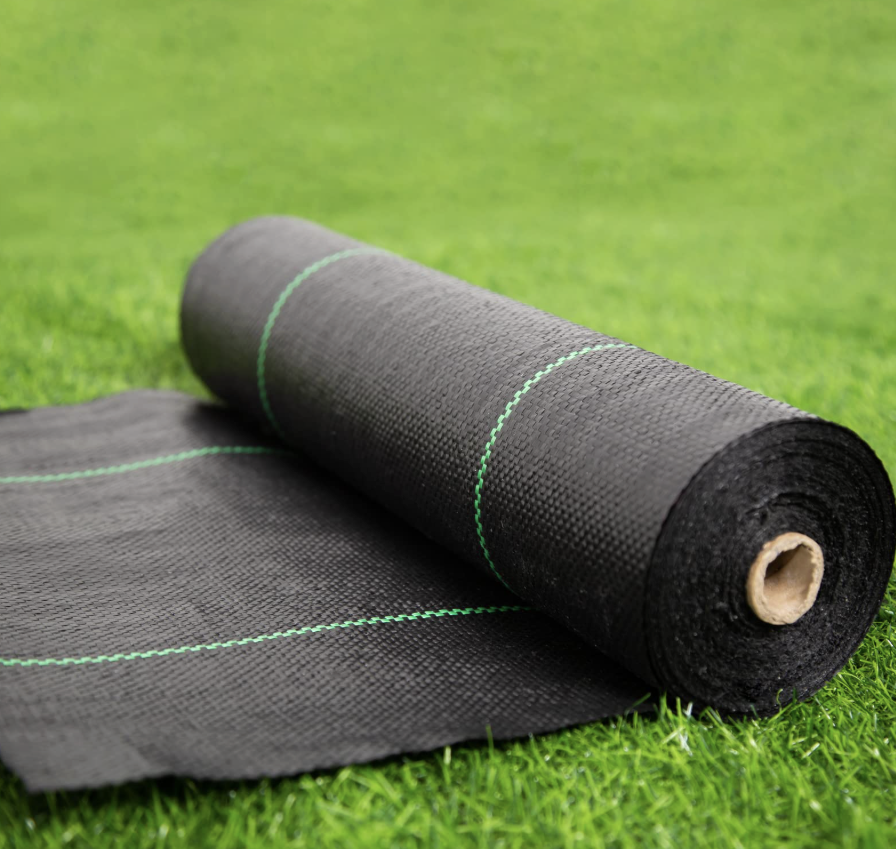
For crops that stay in the ground 50 days or longer, such as tomatoes, peppers, squash, brassicas, landscape fabric, or silage tarp, weed control can eliminate almost all in-season weeding for that bed. You cut planting holes to your spacing, and the fabric does the rest. Budget $70 to $200 per roll, depending on size.
Irrigation
Irrigation is infrastructure, not just equipment, and it’s one of the highest-value investments you can make on a small farm.
Drip irrigation
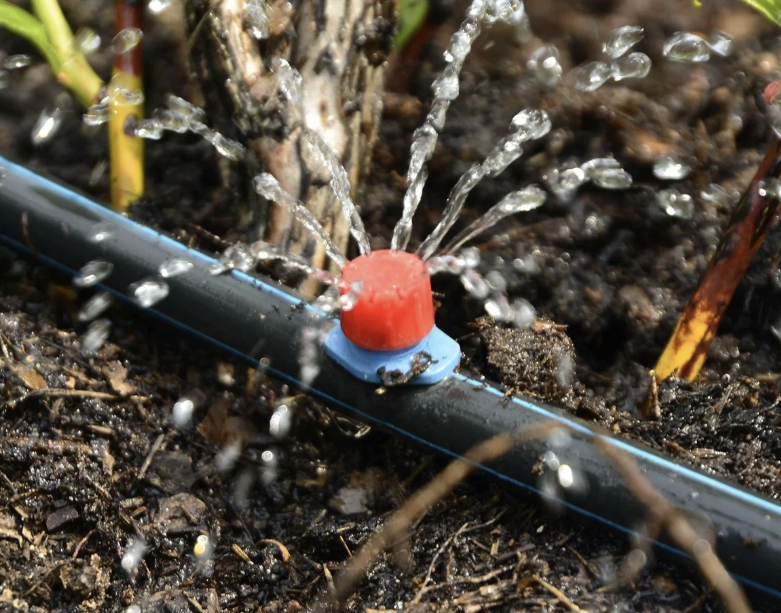
Drip tape or drip line delivers water directly to plant roots with minimal evaporation and minimal leaf wetness (which reduces disease pressure). It’s water-efficient, labor-efficient, and works beautifully in permanent bed systems. It requires setup, filtration, and pressure regulation, but once installed, it saves significant daily time. Budget varies: a basic system for a quarter-acre market garden might cost $500 to $1,500, including mainlines, drip tape, and filters.
Overhead sprinklers and micro-sprinklers
Overhead irrigation is useful for germination (especially for direct-seeded crops), establishing transplants, and cooling crops in heat. Micro-sprinklers on short risers are useful in greenhouses and tunnels. Budget varies by scale.
Backpack and pump sprayers
For small farms, a good backpack sprayer is essential for applying liquid fertilizers, compost tea, pest controls, and fungicides. Electric backpack sprayers eliminate manual pumping and are significantly more comfortable for larger applications. Budget $150 to $350 for a quality electric model.
Harvest Equipment
Harvesting knives and shears
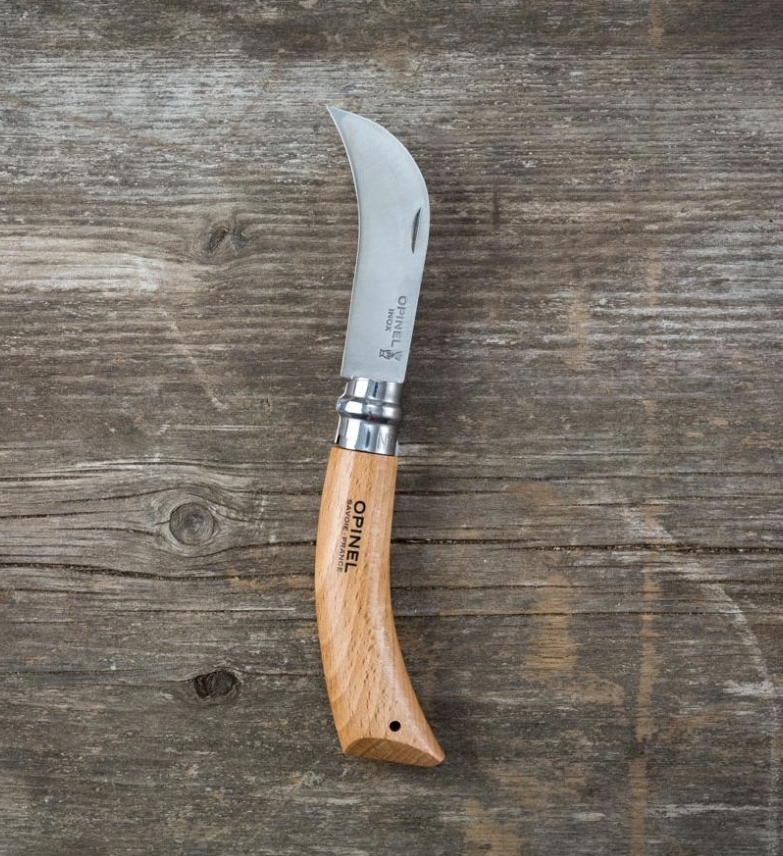
Every farmer needs quality cutting tools in their pocket at all times. A good harvesting knife (like an Opinel No. 10) is used for zucchini, lettuce, leeks, herbs, and dozens of other crops. Good-quality pruning shears handle herbs, flowers, tomato suckers, and fruit tree maintenance. Budget $30 to $80 for each.
Quick-cut greens harvester
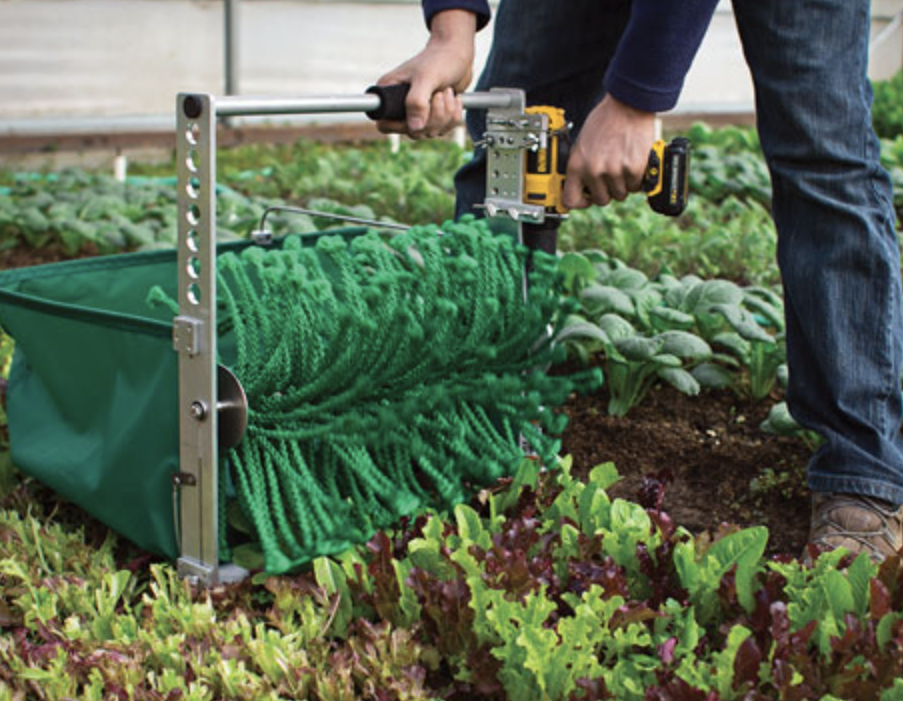
If you’re harvesting more than 50 pounds of baby greens or salad mix per week, this tool will transform your operation. A battery-powered greens harvester cuts a full 30-inch bed of mesclun in seconds. What takes two people four hours can be done solo in under an hour. Budget $650 to $900.
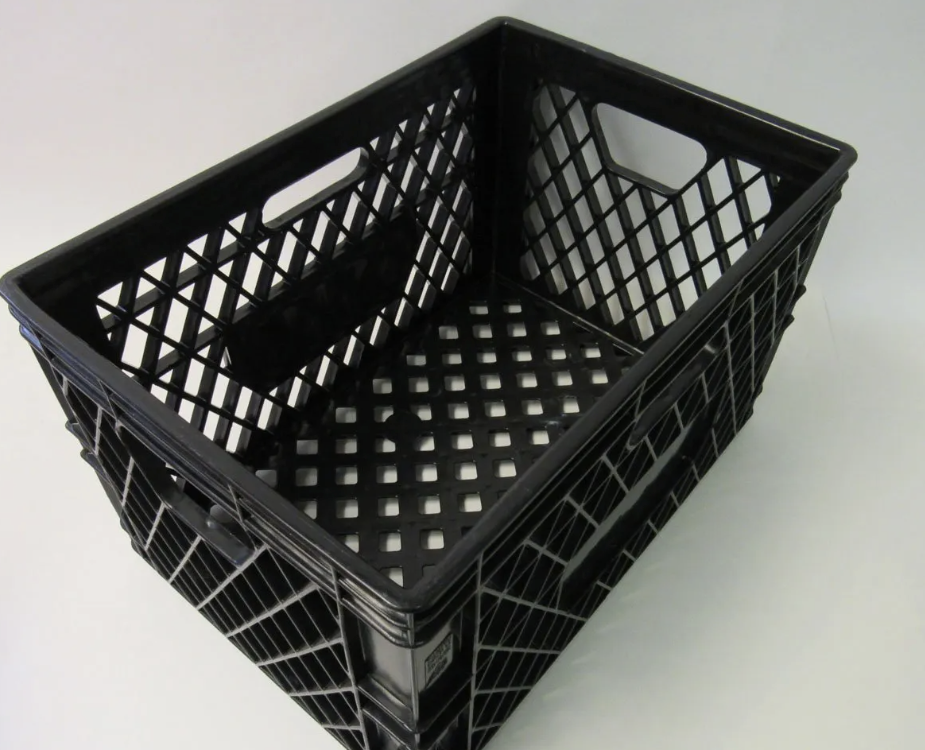
Harvest bins and crates
Uniform bins that stack are essential for post-harvest handling. You need bins that fit your pathways, your wash station, and your cooler. Buy uniform sets rather than mixing random containers; it makes everything faster and more organized. Budget $50 to $70 for a starter set.
Harvest cart
A well-designed harvest cart rides on your paths and lets you load bins directly in the field. Ergonomics matter enormously over a 6-hour harvest day. Look for one with good clearance, rubber tires that don’t compact beds, and a bed width that fits your pathways.
Budget $300 to $700.
Post-Harvest and Cold Storage
Wash station
A dedicated wash station, even a simple setup with a stock tank, some drainage, and running water, is one of the highest-value infrastructure investments a vegetable farmer can make. Washing produce quickly after harvest preserves quality and reduces waste.
Cold storage
Fresh vegetables lose quality rapidly at ambient temperatures. Even a basic cold storage setup, a well-insulated room, and a CoolBot system paired with a standard window air conditioner can maintain proper temperatures at a fraction of the cost of a commercial refrigeration unit. A CoolBot setup can cost $250 to $400 for the controller; the rest depends on your room.
Fencing Equipment
Post driver and post hole digger
Anyone running livestock, even a small flock of chickens, a few pigs, or a handful of sheep, needs the ability to install and maintain fencing. A manual or hydraulic post driver, combined with a manual or tractor-mounted post hole digger are necessary tools. For farmers without a tractor, a hand-operated post driver or a fence attachment for an ATV can work well.
Electric fence equipment
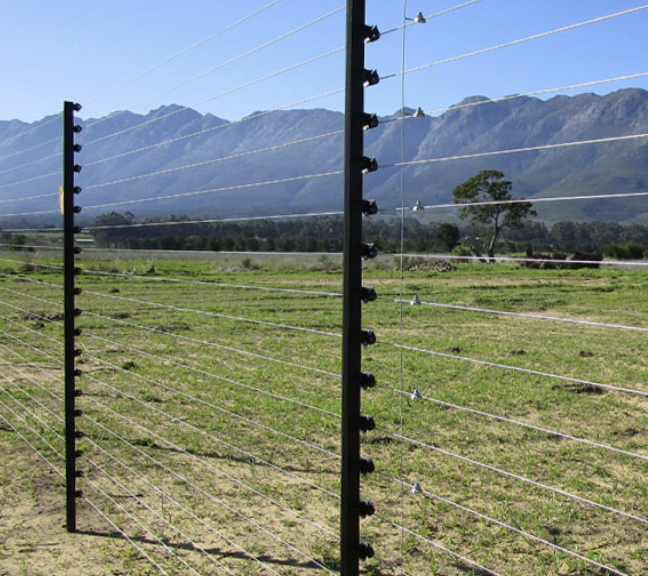
Electric fencing is one of the most cost-effective and versatile livestock management tools available. A good solar-powered energizer, appropriate step-in posts, and quality polywire let you subdivide pasture for rotational grazing or predator control quickly and inexpensively. Budget $200 to $600 for a starter setup
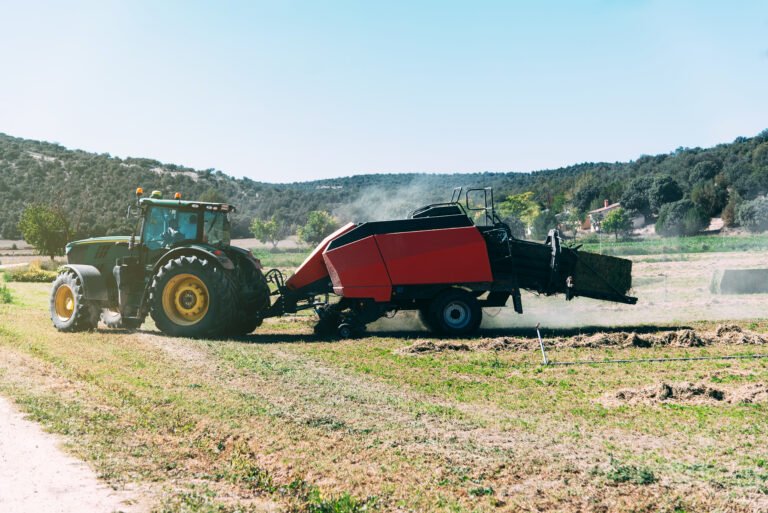
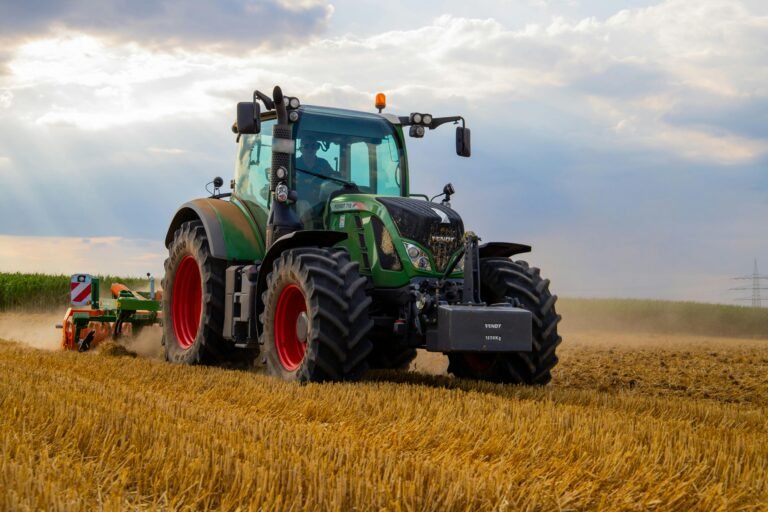
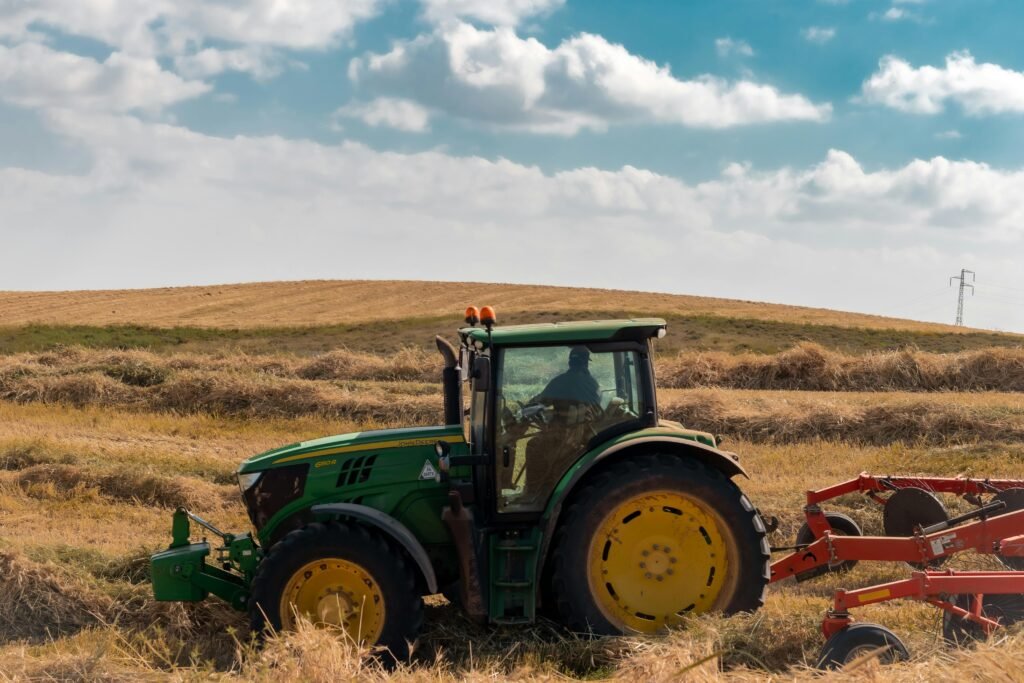
The Tractor Conversation Nobody Wants to Have
You might not need a tractor.
Or at least, you might not need one yet.
The tractor conversation in farming has a way of becoming a rite of passage discussion, as though not having a tractor means you’re not a real farmer. That’s not true. What’s true is that a tractor is the right tool for certain scales and certain types of work, and it’s the wrong tool, or at least premature, for many beginning farmers on 2 to 10 acres.
When a tractor makes sense:
You’re farming more than 10 acres in row crops, hay, or pasture management. You need to move heavy loads regularly, compost, mulch, gravel, and heavy equipment. You’re making or moving bales of hay. You have implements that require a three-point hitch and PTO to operate. Tractors genuinely shine in all of these situations.
When a tractor might not be the right first purchase:
You’re farming under 10 acres in intensive vegetables or small grains. Your rows are narrow, and your land is tight. You don’t have anywhere to store a tractor safely. Your budget is limited, and a tractor would consume funds that could be better spent on irrigation, seed, or market infrastructure. In these situations, a walk-behind two-wheel tractor, good hand tools, and efficient systems can outperform a four-wheel tractor on a smaller footprint.
If you do buy a tractor, here’s what matters:
Size it for what you’re doing now, not for the farm you imagine having in ten years. A 25 to 35 HP compact tractor handles most tasks on farms up to 20 acres. A 40 to 60 HP utility tractor handles heavier hay and larger acreage. Anything over 60 HP is typically overkill for a farm under 50 acres unless you’re doing serious row crop work.
Buy from a brand with a local dealer. John Deere, Massey Ferguson, Case IH, New Holland, Kubota, and Mahindra all have broad dealer networks. The specific brand matters less than the dealer’s relationship. A dealer who answers the phone during harvest time is worth more than a brand name.
Consider a used tractor over new unless you have specific reasons to buy new. A 10-year-old tractor with 1,200 hours on it and good maintenance records often provides 90 percent of the capability at 40 to 50 percent of the new cost.
Ask about mobile service before you buy. A dealer with a mobile repair truck can come to your farm when something goes wrong during critical seasons. That service is genuinely valuable.
All the Equipment That Isn’t a Tractor — and Matters Just as Much
Let’s give this category the attention it deserves.
Hand Tools Every Small Farmer Needs
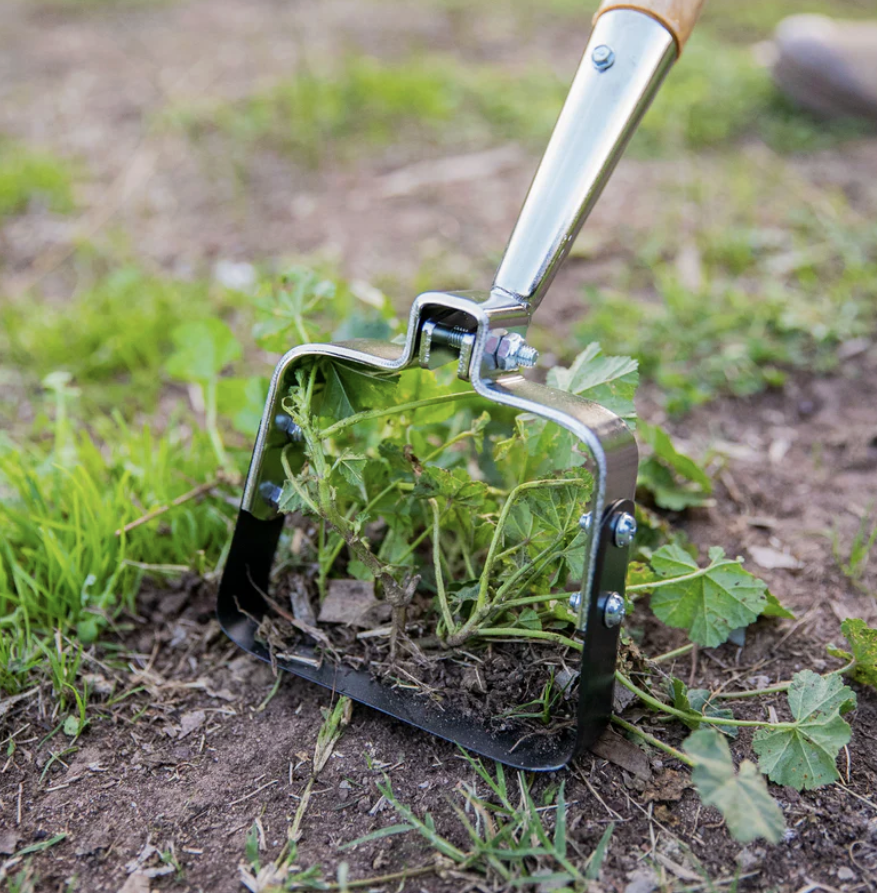
Quality hoes — multiple styles:
This is not the time to cheap out. A stirrup hoe, a collinear hoe, and a standard flat hoe are three different tools that serve three different purposes. The stirrup hoe cuts on both strokes for between-row cultivation. The collinear hoe works close to plant stems under foliage. The flat hoe moves soil and cuts heavier weeds. Invest in high-quality hoes with solid handles — you’ll use them thousands of times.
Budget $40 to $90 per hoe from quality suppliers.
Digging forks and spading forks
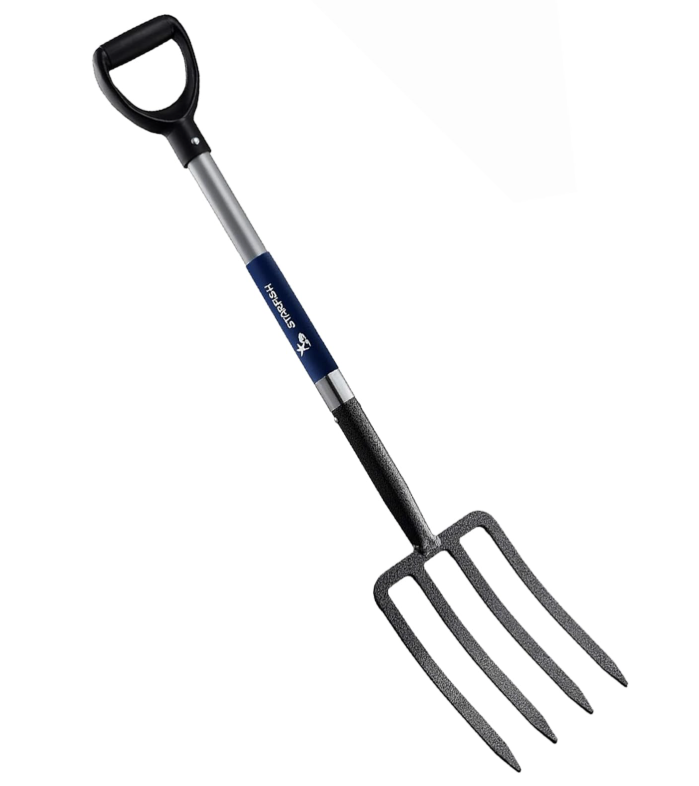
For lifting root crops, turning compost, moving mulch, and general soil work, a quality digging fork is indispensable. Look for forged steel tines rather than welded stamped steel; they last dramatically longer.
Hand trowels and transplant trowels
You’ll use these constantly for transplanting, spot weeding, and small planting tasks. Buy one you like the weight and balance of. Budget $25 to $60 for a quality one.
Soil knife (hori hori)
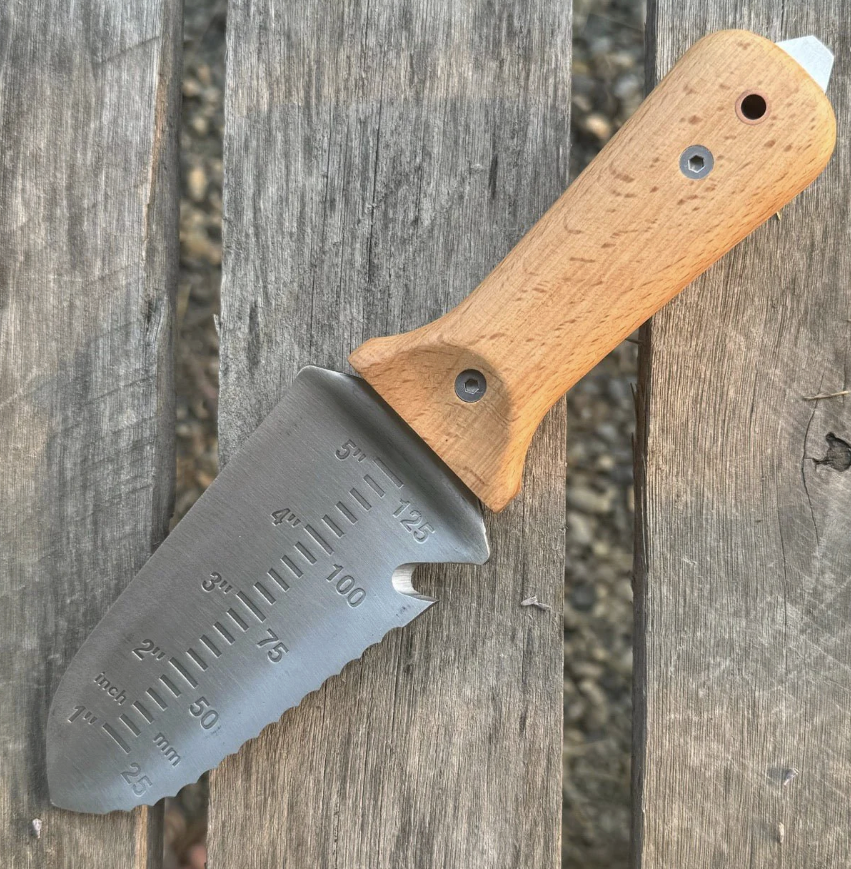
A Japanese soil knife is a multi-purpose tool that digs, cuts roots, opens bags, and does the work of several smaller tools. Many experienced farmers consider it their most-used everyday tool.
Small-Scale Power Tools (Under 5,000)
Electric backpack sprayer
This deserves its own spotlight. A quality electric backpack sprayer eliminates the shoulder fatigue and rhythm interruption of manual hand-pumping. If you spray any liquid inputs, compost tea, pest controls, or foliar fertilizers, an electric backpack sprayer is worth every dollar.
Budget $150 to $350.
Battery-powered drill with tilther attachment
A tiller is a lightweight, 15-inch tool that attaches to a battery-powered drill and works the top 1 to 2 inches of a prepared seedbed. It’s perfect for greenhouse and tunnel growing, for refreshing beds between successions, and for light surface work.
Budget $200 to $350.
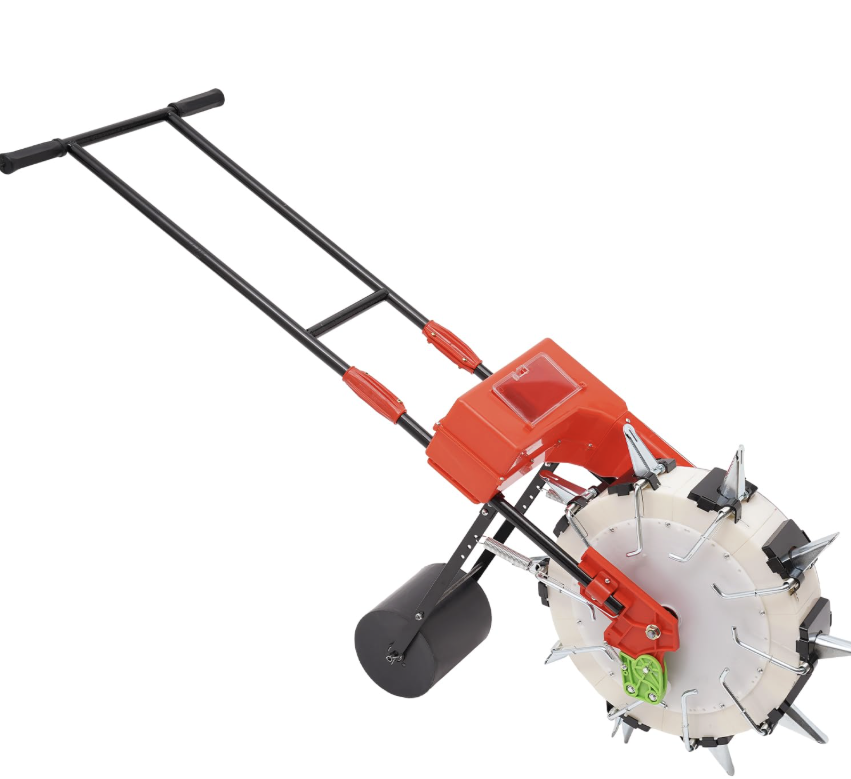
Walk-behind cultivators
Single-wheel and double-wheel cultivators with interchangeable blades and tines are highly efficient for row crop cultivation between plant rows. They cover more ground than a hand hoe with less effort. Budget $200 to $600
Portable water pump
If you don’t have permanent irrigation infrastructure, a reliable portable gasoline or electric pump to pull from a tank, pond, or well gives you flexibility during establishment.
Budget $200 to $600, depending on flow rate and head pressure.
Rent, Buy, or Share? A Real Decision Framework
Nobody tells you this clearly: ownership is not always the best answer.
For beginning farmers and for equipment used less than once or twice a year, renting or sharing often makes more economic sense than buying. Here’s how to think through it.
When buying makes sense:
You’ll use it weekly or monthly throughout the season. It’s a core tool that directly enables your daily operation, a wheel hoe, a seeder, a sprayer. Used equipment in good condition is available at a significant discount. The equipment holds its value and can be resold later. Availability of rental equipment in your area is unreliable or expensive.
When renting makes sense:
You need it only once or twice a year, such as hay baling, a large soil amendment application, or custom harvesting. The upfront cost is prohibitive, and your cash flow doesn’t support a loan payment. You’re not sure if the operation will require that piece long-term. You’re still learning whether a particular crop or enterprise is viable.
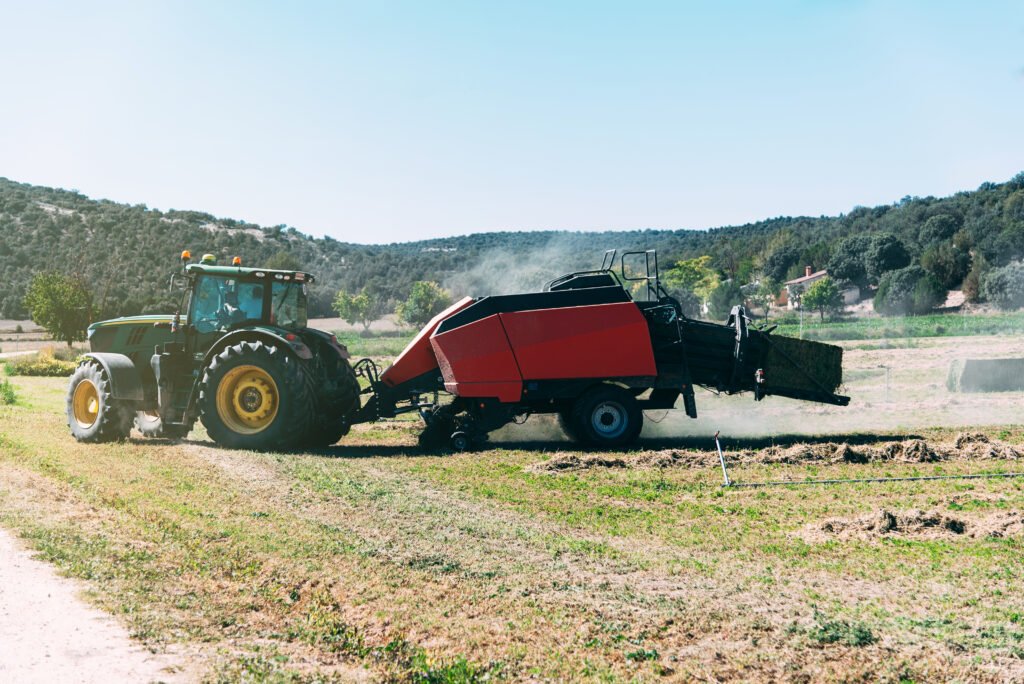
Examples of equipment worth renting in early years: balers (unless you’re cutting significant acreage), grain combines, large-format tillers for initial field preparation, chisel plows, and subsoilers for one-time deep compaction work.
When sharing or co-owning makes sense:
You have neighboring farmers whose needs don’t overlap with yours seasonally. The equipment is expensive but intermittently needed. You have existing relationships with farmers you trust. A shared tool shed with three or four neighboring farms can house equipment that none of them individually could justify owning, and everyone benefits.
Custom hire, paying a neighboring farmer or contractor to do specific field operations, is another underutilized option. If you’re growing hay on 8 acres but can’t justify owning all the hay equipment, hiring a custom operator to mow, ted, rake, and bale for you is often significantly cheaper than owning the full equipment set.
Questions to ask before deciding:
What is the total annual cost of ownership (purchase price amortized over useful life, plus maintenance, storage, insurance, and fuel)? What would it cost to rent the same capability each time I need it? Is the equipment available to rent locally when I need it? What’s the opportunity cost of the capital tied up in ownership?
Run the numbers. They’ll tell you what the right answer is.
How to Prioritize Purchases on a Budget
Budget discipline is one of the most important skills a beginning farmer can develop. The equipment industry is very good at making everything feel essential. It isn’t.
Here is a framework for making smart, phased decisions.
Start with the “can’t operate without it” list.
These are the tools without which you literally cannot do the core work of your farm. For a market gardener: seeder, hand tools, and irrigation. For a hay farmer: tractor, mower, baler (or custom hire). For a small livestock operation: fencing, handling equipment, and watering systems. Everything else is secondary until these are covered.
Apply the 60/30/10 rule.
Approximately 60 percent of your equipment budget should go to your primary power unit, tractor, walk-behind tractor, or ATV. About 30 percent should go to attachments and implements. The remaining 10 percent covers hand tools, consumables, and safety gear. This ratio keeps you from spending your tractor money on accessories before you have the tractor.
Phase your purchases over three to five years.
Year one: core essentials that directly enable production. Year two: equipment that increases efficiency and reduces labor in your most time-consuming tasks. Year three and beyond: equipment that improves quality, enables expansion, or reduces risk. Don’t feel pressure to be fully equipped on day one.
Buy the best used over the cheapest new.
A well-maintained piece of used equipment from a reputable brand almost always outperforms cheap new equipment. Look for maintenance records. Inspect carefully or bring someone who knows what they’re looking at. Used equipment from farmers who have upgraded is often in excellent condition.
Build in a contingency buffer.
Set aside 10 to 20 percent of your equipment budget as a reserve. Unexpected needs always arise. The water pump you didn’t expect to need. The deer fence that suddenly became necessary. The cover crop seeder you found at an estate sale for a price you couldn’t pass up. Financial flexibility lets you act when the right opportunity appears.
Track cost per acre or cost per unit produced.
Every piece of equipment on your farm should be earning its keep. If you have a $6,000 investment in an irrigation system and it serves 2 acres of vegetables producing $40,000 in revenue per year, that’s an excellent return. If you have a $4,000 implement you’ve used twice in three years, it’s probably not earning its keep. Review your equipment annually against your actual usage data.
Budget for ongoing costs, not just purchase price.
Factor in fuel, insurance, maintenance parts, and replacement timing from the beginning. Plan to spend 8 to 15 percent of your total capital equipment cost annually on maintenance, repairs, and parts. This isn’t a pessimistic number; it’s a realistic one, and ignoring it leads to cash flow surprises that derail operations.
Mistakes Small Farmers Commonly Make
Learning from other farmers’ mistakes is one of the most valuable things you can do. Here are the ones we see most often, and how to avoid them.
Buying too big, too soon:
This is the number one mistake. A tractor too large for your current operation burns more fuel, causes more soil compaction, doesn’t maneuver well in tight spaces, and costs more to maintain. Buy according to your needs.
Buying everything before they know what they need:
The first year of farming teaches you things you cannot learn any other way. Many beginning farmers spend heavily on equipment in year one and then realize, after one full growing season, that half of what they bought doesn’t fit how they actually work. If possible, under-equip in year one and add intentionally in year two.
Choosing equipment that doesn’t match their farm layout:
Row width, slope, field shape, and existing infrastructure all constrain your equipment options. Figure out your farm’s physical characteristics before you buy, not after.
Not talking to other farmers first:
Your neighboring farmers, particularly those operating at a similar scale and growing similar things, have already made most of the mistakes you’re about to make. Buy them a coffee and ask what they wish they’d known. The advice you’ll get in an hour of honest conversation is worth more than any article.
Buying cheap hand tools:
A $15 hoe will break or bend within a season. A $65 quality hoe from a reputable manufacturer will last a decade with proper care. Over the life of the tool, the expensive one is dramatically cheaper. This is true of most hand tools.
Forgetting about post-harvest and storage:
Many beginning farmers focus entirely on production equipment and then realize they have nowhere to properly wash, cool, and store their harvest. Post-harvest infrastructure directly affects product quality, shelf life, and customer satisfaction. Don’t wait too long to invest here.
Underestimating the value of simple tools:
A quality wheel hoe or stirrup hoe can eliminate more labor on a small farm than a $30,000 tractor with a cultivating attachment. Don’t dismiss simple tools because they’re not impressive. On a small scale, simplicity often wins.
Assuming used means risky:
Using equipment from farmers who maintain their machines is often more reliable than cheap new equipment from budget brands. Learn how to evaluate used equipment, or bring someone who knows, and you’ll find excellent value in the used market.
Not reading the service manual:
Every piece of equipment you buy comes with a manual. Read it. Know the service intervals, the proper operating parameters, and the common failure points. This information is free, and it can prevent expensive breakdowns.
Real-Life Examples from Farmers Like You
Abstract principles are helpful. Real stories are better. Here are composite examples drawn from small farmers navigating these decisions.
Maria, 4-acre market garden, first-year farmer:
Maria came into farming with a $20,000 equipment budget and a strong urge to buy a compact tractor. After talking to three other market gardeners in her county, she changed her approach. She bought a BCS 853 two-wheel tractor with a power harrow and flail mower attachment ($7,200), a Jang JP-1 seeder ($380), a basic drip irrigation system for her main beds ($900), a set of quality stirrup hoes and a wheel hoe ($350), and a harvest cart ($450). She used the remaining $10,720 to invest in her seed barn, caterpillar tunnel, and working capital.
By mid-season, she was clear that the walk-behind tractor was doing everything she needed and that a four-wheel tractor would have been significant overkill for her scale. She plans to evaluate whether she needs one after year three, when she’ll have a much clearer picture of where the operation is going.
The Ortega family, 22 acres mixed operation — hay and vegetables:
The Ortegas were running hay on 15 acres and vegetables on 7 acres when they realized they had two completely different equipment needs on the same farm. For hay: a used 50 HP utility tractor, a disc mower, a wheel rake, and access to a custom baler (they hire a neighbor to bale for 88/bale rather than own the machine). Their biggest early mistake was buying a large utility tractor, assuming it would serve both sides of the operation well. It turned out to be too large for the vegetable side and almost impossible to maneuver on their narrow market garden beds. They eventually bought a separate, much smaller tractor for the vegetable side and used the utility tractor exclusively for hay. Lesson: one machine rarely serves two very different enterprises well.
James, 8-acre pastured poultry operation:
James’s biggest equipment needs were fencing and poultry infrastructure, neither of which shows up prominently in most equipment guides. He invested heavily in a solar-powered electric fence energizer, quality step-in posts, polywire, and the tools to install and move fencing efficiently. He also built DIY pastured poultry shelters (chicken tractors) for his laying flock rotation.
His tractor was a 25 HP compact with a bucket loader, primarily used for moving compost, feed, and occasionally shaping ground for infrastructure projects. Total tractor investment:
Total tractor investment: $18,000 used. Total fencing and poultry infrastructure investment: about $6,000. The second number made his operation work far more than the first.
Conclusion
The right equipment won’t make you a better farmer by itself. But the wrong equipment, or too much equipment too soon, can genuinely derail an operation that would otherwise thrive. Getting this right matters.
So think before you spend the money. Visit the dealership before you need something. Talk to the farmers around you. Walk your fields and be honest about where you’re actually losing time and energy. Buy the farm you have, with a clear plan for the farm you’re building.
Start with your core essentials. Add incrementally as your operation and income grow. Maintain what you have. And don’t be afraid to rent, hire, or share when ownership doesn’t make sense.
You’re not behind just because you don’t have a barn full of equipment. Some of the most productive small farms we’ve ever seen run on a modest walk-behind tractor, a good set of hand tools, and an irrigation system that runs while the farmer does other work.